

When applications were developed twenty years ago and ran on computers that had no backend, most of the operations carried out by the program were synchronous, causing the rest of the application to wait while certain commands or functions complete.

As time went on and apps became more reliant on accessing data via APIs or other sources that aren’t locally available on a device itself, processing data in a synchronous way became unappealing, and rightfully so.
We can’t lock up a UI for seconds at a time while our user requests data from an API.
For this and many other reasons, modern programming languages and frameworks (like Dart and Flutter) contain constructs that help us deal with streams.
In this post, we’ll look at the following concepts:
StreamController and how we can emit events into itStreamBuilder in Flutter to update our UISomething that should be said almost immediately when talking about streams is that when I first started learning about them, they dazzled and confused me. It’s possible that I’m just an average developer, but there are countless articles online about people, not really understanding streams.
While they’re actually quite simple, they’re very powerful, and with this increase in power comes the possibility that you could implement them incorrectly and cause problems. So, let’s talk about what streams are in the first place.
To understand what streams are, let’s first start with the things that we do understand, which are normal synchronous methods. These aren’t fancy at all, in fact, here’s an example of one:
final time = DateTime.now();
In this example, we’re retrieving the date and time from a method that is synchronous. We don’t need to wait on its output because it completes this function in less than a millisecond. It’s okay for our program to wait on the output in this instance because the wait is incredibly short.
Now, let’s look at an asynchronous method by using the async and await keywords. We’ll do this by getting the current time and then, by using Future.delayed, get the time 2 seconds in the future, like this:
void main() async {
  print('Started at ${DateTime.now()}');
  final time = await Future.delayed(Duration(seconds: 2)).then((value) => DateTime.now());
  print('Awaited time was at $time');
}
The result of running this is the following:
Started at 2021-10-28 17:24:28.005
Awaited time was at 2021-10-28 17:24:30.018
So, we can see that in our app, we receive our initial time and a time that is 2 seconds in the future. In reality, we can await a variety of data sources that return in the future, like APIs, or file downloads.
By using the async/await pattern, we can retrieve this data and operate on it when it completes.
But, what would we do if we wanted to retrieve the time every 2 seconds? It’s true that we could wrap it in a for loop and, for our trivial example, that would be okay.
However, this is essentially the same as polling for updates where we make the request every 2 seconds to see whether something changes. Polling is not good for battery life or user experience because it puts the onus on the client device or app to check whether something changes.
It’s instead better to put this responsibility on the server, having the server tell us when something changes and the app subscribes to those updates.
That’s where streams come in. We can easily subscribe to a stream, and when it yields a new result, we can work with that data as we choose.
In the below example, we set up a StreamController and use Timer.periodic to send an event into the stream every 2 seconds. Immediately afterward, we subscribe to the stream within the stream controller and print when it updates:
import 'dart:async';

void main() async {
    final streamController = StreamController<DateTime>();
    Timer.periodic(Duration(seconds: 2), (timer) {
      streamController.add(DateTime.now());
    });

    streamController.stream.listen((event) {
      print(event);
    });
}
The output of this is as follows:
2021-10-28 17:56:00.966
2021-10-28 17:56:02.965
2021-10-28 17:56:04.968
2021-10-28 17:56:06.965
2021-10-28 17:56:08.977
2021-10-28 17:56:10.965
So, now we have our subscription to the stream and it’s emitting over time. That’s great. But we’ve got a small bug with this implementation: we never disposed or cleaned up our subscription to the stream.
This means that even if the user goes to another part of our app or does something else, our app will still listen to this stream and process the results.
It’s okay for us to expend resources running processes that are relevant to the user, but once the user navigates away or uses a different part of our app, we should cancel our subscriptions and clean up the components we used along the way.
Fortunately, we can keep a reference to our subscription and cancel it when we’re not using it anymore. In this case, we’re canceling our subscription after a certain amount of time:
import 'dart:async';

void main() async {
   final streamController = StreamController<DateTime>();
    final unsubscribeAt = DateTime.now().add(Duration(seconds: 10));
    StreamSubscription<DateTime>? subscription;

    Timer.periodic(Duration(seconds: 2), (timer) {
      streamController.add(DateTime.now());
    });

    subscription = streamController.stream.listen((event) async {
      print(event);
      if (event.isAfter(unsubscribeAt)) {
        print("It's after ${unsubscribeAt}, cleaning up the stream");
        await subscription?.cancel();
      }
    });
}
Again, we have our subscription, but now we’re canceling it. When we cancel it, the app can release the resources involved in making the subscription, thus preventing memory leaks within our app.
Cleaning up subscriptions is integral to using streams in Flutter and Dart, and, if we want to use them, we must use them responsibly.
The last thing we must consider is how we handle errors because sometimes our stream can produce an error.
The reasons for these can be vast, but if your stream is connected for real-time updates from a server and the mobile device disconnects from the internet, then the stream disconnects as well and yields an error.
When this happens and we don’t handle the error, Flutter will throw an exception and the app can potentially be left in an unusable state.
Fortunately, it’s fairly easy to handle errors. Let’s make our stream yield an error if our seconds are divisible by three, and, for the sake of completeness, let’s also handle the event when the stream completes:
import 'dart:async';

void main() async {
   final streamController = StreamController<DateTime>();
    final unsubscribeAt = DateTime.now().add(Duration(seconds: 10));
    late StreamSubscription<DateTime> subscription;

    final timer = Timer.periodic(Duration(seconds: 2), (timer) {
      streamController.add(DateTime.now());
      if (DateTime.now().second % 3 == 0) {
        streamController.addError(() => Exception('Seconds are divisible by three.'));
      }
    });

    subscription = streamController.stream.listen((event) async {
      print(event);
      if (event.isAfter(unsubscribeAt)) {
        print("It's after ${unsubscribeAt}, cleaning up the stream");
        timer.cancel();
        await streamController.close();
        await subscription.cancel();
      }
    }, onError: (err, stack) {
      print('the stream had an error :(');
    }, onDone: () {
      print('the stream is done :)');
    });
}
The output from this is as follows:
2021-10-28 17:58:08.531
2021-10-28 17:58:10.528
2021-10-28 17:58:12.527
the stream had an error :(
2021-10-28 17:58:14.526
2021-10-28 17:58:16.522
It's after 2021-10-28 17:58:16.518, cleaning up the stream
the stream is done :)
We can see that we’re handling the error internally (in this case by printing a message, but here’s where we’d use a logging framework to capture what went wrong).
So, let’s recap. We learned:
Now let’s bring Flutter into the mix! 😊
To work out how streams work within a Flutter app, we’ll create a simple app called flutter_streams that has a service with a StreamController in it. We’ll subscribe to updates from this StreamController to update the UI for our users. It’ll look like this:
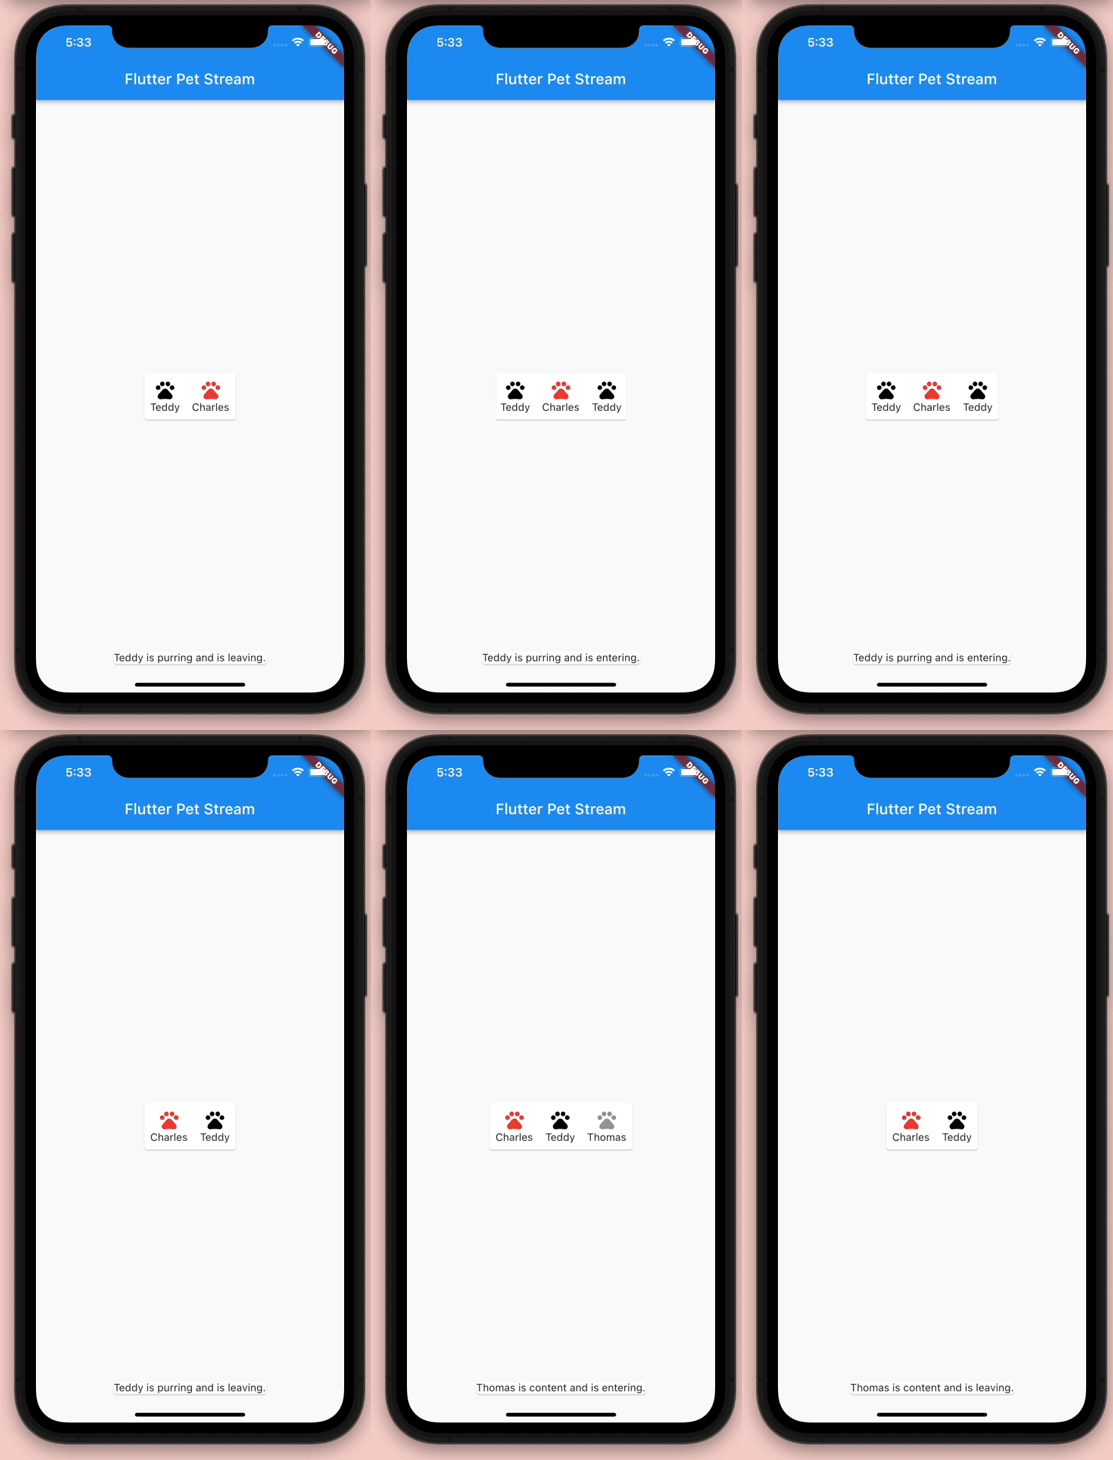
Our app will show us what cat is coming, going, and also what state the cat is in when it does these things (meowing, content, or purring). So, we’ll need a list of cats to choose from.
We’ll create our service at services\petservice.dart and the first few lines will be a list of cats that our service can randomly choose from:
const availablePets = <Pet>[
  Pet('Thomas', Colors.grey, PetState.CONTENT),
  Pet('Charles', Colors.red, PetState.MEOWING),
  Pet('Teddy', Colors.black, PetState.PURRING),
  Pet('Mimi', Colors.orange, PetState.PURRING),
];
Next, we’ll use an enum to define the various states our cat can be in. It can enter or leave while being content, meowing, or purring. Let’s set up these enums now:
enum PetState {
  CONTENT,
  MEOWING,
  PURRING,
}

enum PetAction {
  ENTERING,
  LEAVING,
}
Finally, for our data, let’s declare a Pet class that contains the name, color, and state of our pet. We must also override the toString method of this class so when we call toString() on a Pet object, we receive information on the object in detail:
class Pet {
  @override
  String toString() {
    return 'Name: $name, Color: ${color.toString()}, state: $state';
  }

  final String name;
  final Color color;
  final PetState state;

  const Pet(
    this.name,
    this.color,
    this.state,
  );
}
Because our cats can come and go at random, we set up a function to randomly choose cats from our availablePets list, like this:
Pet randomCat() => availablePets[rand.nextInt(availablePets.length)];
While we’re still in the same file, let’s create our PetService that exposes a StreamController for other parts in our app to listen to:
final petStream = StreamController<PetEvent>();
Then, in the constructor, we can set up a periodic timer that emits every three seconds into the StreamController when a pet either arrives or leaves. This is quite a long piece of code, so we’ll sum up what we’re doing first.
First, every three seconds we generate a random number between 0 and 1 (inclusive). If it’s 0, we:
petStream to say that the cat arrivedIf it’s 1 and the list of current pets is not empty, we:
petStream to say the cat leftThe code for this looks like the following:
// We add or remove pets from this list to keep track of the pets currently here
final pets = <Pet>[];
// Set up a periodic timer to emit every 3 seconds
Timer.periodic(
  const Duration(seconds: 3),
  (timer) {
    // If there are less than 3 pets in the list
    // then we always want to add pets to the list
    // (otherwise a pet and come and leave over and
    // over again)
    //
    // Otherwise we're flipping a coin between 0 and 1
    final number = pets.length < 3 ? 0 : rand.nextInt(2);
    print(number);

    switch (number) {
      // 0 = A cat has arrived
      case 0:
        {
          print('Pet Service: A new cat has arrived');
          // Get a random cat
          final pet = randomCat();
          // Emit an event that a cat has arrived
          petStream.add(PetEvent(
            pet,
            PetAction.ENTERING,
            pets,
          ));
          // Add the pet to the internal list
          pets.add(pet);
          break;
        }
      // 1 = A cat is leaving
      case 1:
        {
          // Only remove pets from the list if there are any pets
          // to remove in the first place
          if (pets.isNotEmpty) {
            print('Pet Service: A cat has left.');
            // Get a random pet from the internal list
            final petIndex = rand.nextInt(pets.length);
            final pet = pets[petIndex];
            // Emit an event that the cat has left
            petStream.add(
              PetEvent(
                pet,
                PetAction.LEAVING,
                pets,
              ),
            );
            // Remove from the internal list
            pets.removeAt(petIndex);
          }
          break;
        }
    }
  },
);
Now that we have our service that emits our pets coming and going, we can wire our visual layer to respond to changes in our stream.
The first thing that we must create is a StatefulWidget. This means our widget can subscribe to updates from our PetService:
@override
void initState() {
  final petService = PetService();
  _petStream = petService.petStream.stream;
  super.initState();
}
Next, we must respond to the updates on this stream and update our app’s screen respectively. Again, this is a bit of a longer code snippet, so let’s review what’s happening before we get to the code.
First, we’ll use a StreamBuilder to react to changes in the stream. Then, within the build method for the StreamBuilder, we must check to see whether the stream yielded any data yet. If it hasn’t, we’ll show a CircularProgressIndicator; if it has, we’ll show the latest updates from the stream:
@override
Widget build(BuildContext context) {
  return Scaffold(
    appBar: AppBar(
      title: Text('Flutter Pet Stream'),
    ),
    body: StreamBuilder<PetEvent>(
      stream: _petStream,
      builder: (context, state) {
        // Check if the stream has data
        if (!state.hasData) {
          // If not, show a loading indicator
          return Center(
            child: Column(
              mainAxisAlignment: MainAxisAlignment.center,
              crossAxisAlignment: CrossAxisAlignment.center,
              children: [
                CircularProgressIndicator(),
                Text('Waiting for some pets...')
              ],
            ),
          );
        }
        // Otherwise, show the output of the Stream
        return Stack(
          children: [
            Center(
              child: AnimatedSize(
                duration: Duration(milliseconds: 300),
                clipBehavior: Clip.antiAlias,
                child: Card(
                  child: Wrap(
                    alignment: WrapAlignment.center,
                    children: [
                      ...?state.data?.activePets.map(
                        (e) => Padding(
                          padding: const EdgeInsets.all(8.0),
                          child: Column(
                            mainAxisSize: MainAxisSize.min,
                            children: [
                              Icon(
                                Icons.pets,
                                size: 30,
                                color: e.color,
                              ),
                              Text(e.name)
                            ],
                          ),
                        ),
                      )
                    ],
                  ),
                ),
              ),
            ),
            SafeArea(
                child: Align(
              alignment: Alignment.bottomCenter,
              child: Card(
                child: Text(
                  state.data!.pet.name +
                      ' is ' +
                      describeEnum(state.data!.pet.state).toLowerCase() +
                      ' and is ' +
                      describeEnum(state.data!.action).toLowerCase() +
                      '.',
                ),
              ),
            ))
          ],
        );
      },
    ),
  );
}
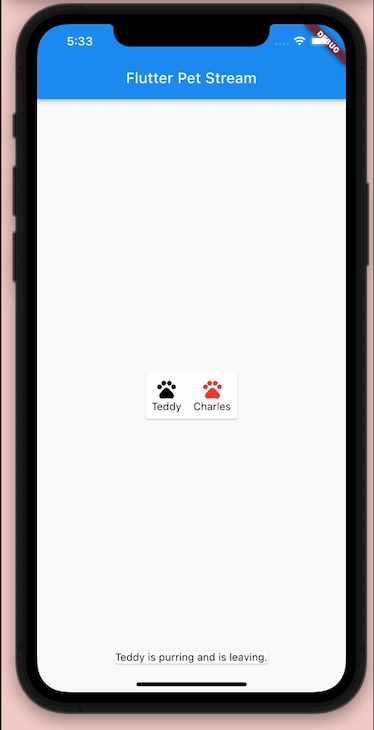
And our finished product will look like this, and it will periodically update as cats come and go 🐱.
Streams are a necessary part of handling and processing asynchronous data. It’s possible that the first time you encounter them in any language, they can take quite a bit of getting used to, but once you know how to harness them, they can be very useful.
Flutter also makes it easy for us by way of the StreamBuilder to rebuild our widgets whenever it detects an update. It’s easy to take this for granted, but it actually takes a lot of the complexity out of the mix for us, which is always a good thing.
As always, feel free to fork or clone the sample app from here, and enjoy working with streams!

Compare the top AI development tools and models of November 2026. View updated rankings, feature breakdowns, and find the best fit for you.
AI coding assistants can generate UI quite quickly, but they don’t know your design system. Here’s how you can teach them the ins and outs.
Build a 3D hero with GPU Style Sheets and compare its code, bundle size, and rendering costs with Three.js.
Learn how to use browser AI APIs for summarization, translation, and language detection with practical examples and implementation tips.
Hey there, want to help make our blog better?
Join LogRocket’s Content Advisory Board. You’ll help inform the type of content we create and get access to exclusive meetups, social accreditation, and swag.
Sign up now

 Learn more →